Under the Hood of Tone CurveA curve, or color curve, is a graphic representation of color and tone. Adjustments to the angle and... More PosterizationA posterized image effect is created by having limited levels or gradient steps within an image. More
I stumbled into this style of posterized Lightroom edits after doing a daily photo edit for a month and a half. Perhaps I was getting a little bored with my daily edit challenge. From the beginning I was hoping to discover something new, as outined here.
Funny thing though, this techinque really isn’t new. I first learned how to posterize an image using the tone curve on a Scitex machine in the early 90’s, before I knew anything about Photoshop. I hadn’t thought about doing it with Lightroom until I ran out of Develop Module tools to explore.
I’ve created quite a few of these images, and I am still enjoying the process. That’s probably because I’m still discovering new things about it.
Crazy Color Edit

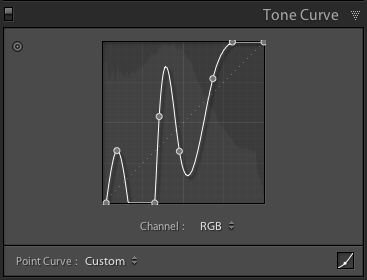
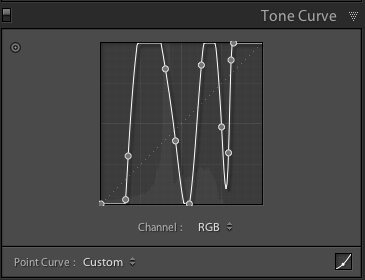
This image is where I really started to bend the rules and the tone curve. The circular color shapes are added with color balance adjustments in a radial filterA filter is a digital effect used to modify image pixels and selections. Algorithms control modifica... More, but the crazy colors start by bending theTone Curve.
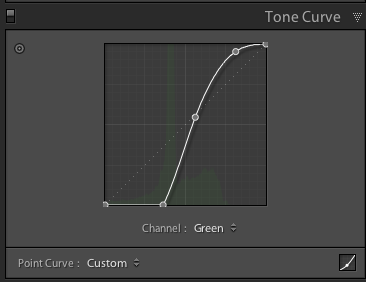
The Tone Curve can be bent like a snake by adding points (simply click on the line) and pull them up or down away from the diagonal center line where they started. The setting in the lower left starts with Point Curve: Linear. It changes to Custom when you start clicking and bending. Clicking on the up and down triangles gives you 3 other boring preset options:
- Linear Curve – returns the curve to it’s starting point.
- Medium Contrast – typical “S’ Curve for mild contrast
- Strong Contrast – typical “S’ Curve for more contrast
Simple and Pure

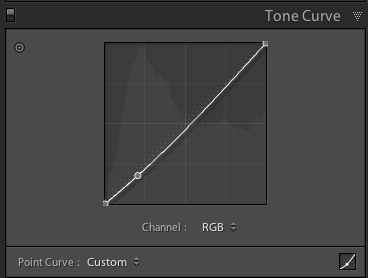
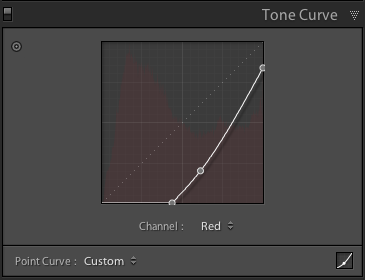
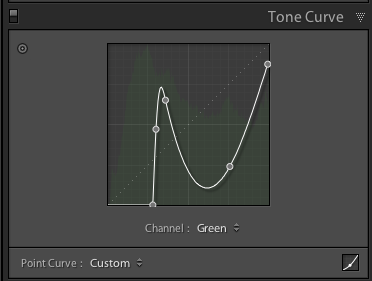
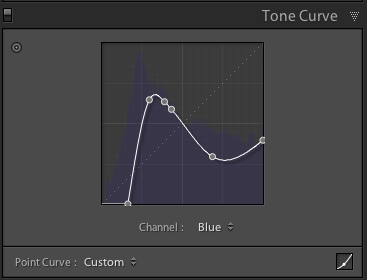
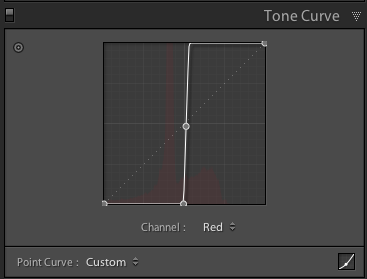
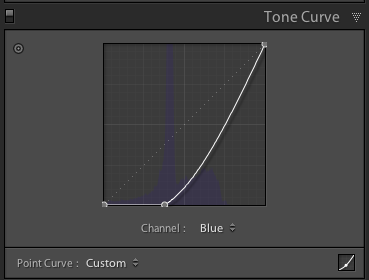
I’d love to print this image, but the colors are probably way out of gamutA range of colors that a given system can reproduce. More for almost any printter. This simplified color pallette is achieved by bending the individual color tone curves.

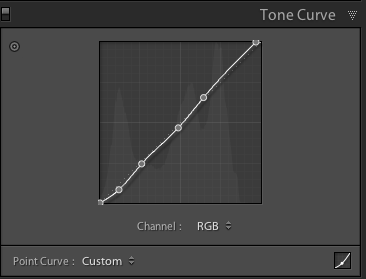
First, a slight S curve is added to all three channels for contrast.


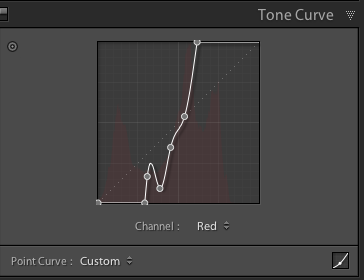
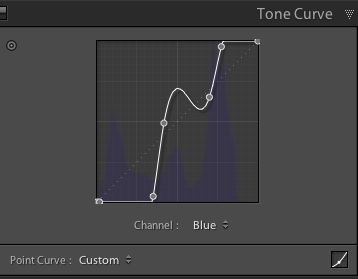
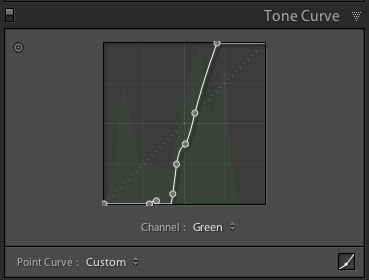
Each color channel has it’s own unique curve bend which creates saturated pure colors. I’m pretty sure individual channel bending is not possible with earlier versions of Lightroom.

I printed this image in my New York City travel book, which you can check out here. The colors aren’t nearly as rich in print.
The basic color paletteA palate can be a set of colors used in a painting program or the number of colors a device can disp... More is created with these tone curve settingsAn application's behaviors and preferences are controlled with settings. More. I used gradient and brushWhat is (Digital) Brush? A brush, found in digital painting applications such as Photoshop, Painter,... More adjustments to brighten the center and darken the edges.
Simple and Bold

I had a clear idea of what I wanted to accomplish with this image of the Martin Luther King Memorial.
The RGBWhat is RGB? RGB stands for Red, Green, and Blue. These are the colors of light. Monitors, TVs, and ... More channel curve was adjusted slightly to fine tune the image.
The veritcal ramp curve creates intense image contrast. Slight tweaks and bends add color. I used the brush adjustment tool to make the stone behind MLK completely blackBlack is the fourth color in the process of four-color printing. The "K" in CMYK. Black adds tonal d... More.
Color Tint

A tinted image like this one of the Lincoln Memorial starts by creating a grayscaleA grayscale image has no color hues but contains a range of gray levels between pure black or white.... More image.
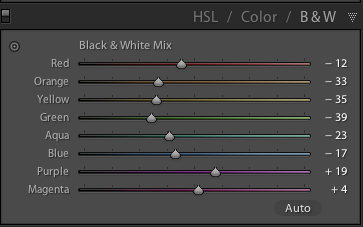
The B&W in the HSL / Color tab works best for this.
Bending all three channels together with the RGB channel posterizes the image, but does not add color. This makes sense because every point on the curve, for every color remains exactly the same.
Pulling down the BlueBlue is the third of three primary colors in an additive color model. The "B" in RGB. More channel (darkening it) adds the color yellowOne of the three primary colors in a subtractive color model. The "Y" in CMYK. More.
A Little More (or Less) Details
Every edit starts by removing all of the noise and the sharpen radius. Agressive curve bending accentuates everything, including noise and grain. I’m looking for smooth solid color shapes, so I start with a smooth image. The sharpen setting is most often set at the extremes of 0 or 100. Zero works best for people and sculptures and one hundred works best for architecture.

My Tone Curve Wish List
Now that I have bent the rules and pushed way outside of “normal”, I am wishing for more. Here’s my list. I may be the only person asking for these things, but you know what they say. It never hurts to ask:
- Right angle curve bends at selected points
- The option to identify individual points on a curve as a right angle or a bent curve
- A larger Tone Curve Panel for better control on clicking points
- Tone Curve edits within selective adjustments
- The ability to save idividual channel curve settings
- An easy way to reset an individual color channel without effecting the others
What’s Next?
When I tire of exploring all the possible results with tone curve bending, I will probably save a few of my favorites as presets. I might publish these. Would you be interested in adding some posterize presets to your Lightroom Library?