Last June I participated in a night HDRHDR is short for High Dynamic Range. HDR (High Dynamic Range) Photography refers to capturing an ent... More photo shoot with Stephen Burns and the San Diego Photoshop Users Group. I came away with a couple good images and a lot of pretty bad ones. This week the group will be returning to Coronado to try it again. These are some lessons I learned from the summer shoot.
Out of Focus
I ended up with several out of focus images like this one. I’m not very good with the manual focus. I don’t know if it’s my eyesight or my camera. Regardless of the reason, I am better off using the auto focus.

The solution is to use the auto focus for every shot. Select the brightest spot in the scene to focus on, and then switch to manual focus to lock it in.
Shutter Speed
Shutter speeds of 30 seconds or longer make the water reflections look really silky. I like that. This time I’m going to keep my ISO at 100 and shoot everything with long shutter speeds.
White BalanceWhite balance determines how overall warm or cool the colors of an image are. More
The surrounding street lights can really throw off the white balance. Many of my images came out yellowOne of the three primary colors in a subtractive color model. The "Y" in CMYK. More. I shoot RAW images so I don’t have to worry about the white balance until the editing stage. Changing the white balance to “Tungsten” improved this image quite a bitA bit is the smallest unit of information in a computer. More. This is the unedited raw image.

There is a lot wrong with this image though. It’s out of focus, I don’t like the composition and it was shot with a 6 second exposure, so the water is missing that silky smooth look.
Extreme High Dynamic Ranges
The light reflections on the water are very bright. It takes more than 4 steps between exposures to capture the range of this image. The highlight reflections are blown out while the rest of the image is almost blackBlack is the fourth color in the process of four-color printing. The "K" in CMYK. Black adds tonal d... More.

I love the light bouncing off the water. I am disappointed I didn’t capture it correctly because I like everything else about this image. Next time I will get it right!
Editing
The real magic of night HDR starts with the editing. I use Photomatix Pro 4 to combine the brackets and tone-map the image. Finish editing is done in Photoshop. I spend as much time editing as I think the image needs.

Even my best image looked terrible right out of the camera.
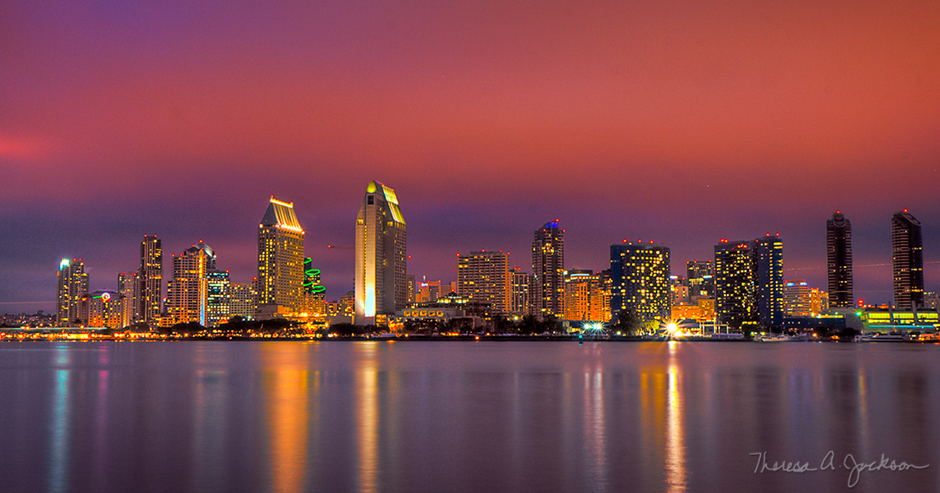
I spent a lot of time editing the tone-mapped Photomatix file in Photoshop before I first shared this image with Stephen Burns. He saw my first version and challenged me to push the contrast even further using a method of light painting with adjustment layers. The water, buildings and sky were each masked and built up separately.
I think the final image was well worth the time I spent working on it.
San Diego Skyline printed on metal will be on display at Gallery 21 in Balboa Park from Nov. 16th – 29th, 2011.