If you are unfamiliar or a little unclear about the differences between vectorVector is a graphic format that does not contain pixels. It is created from mathematical equations a... More and bitmapA bitmap graphic is created pixels, same as a raster graphic. Bitmap and raster are often used inter... More art, it might be helpful to read When Vector Art is Really Vector before starting this tutorial.
Setting Up Your Files
Start by determining your art board size. If I am working on a wide format project I like to work in quarter scale. Illustrator has a maximum canvasCanvas is the entire work area of a document. Think of it as the top of your office desk. More size of 227 inches, so projects larger than that have to be created at a smaller scale factor. See Large File Format File Resolution for a guide to scale factors and resolutions.
For this tutorial I am going to create a 5’ x 3’ banner at full size.
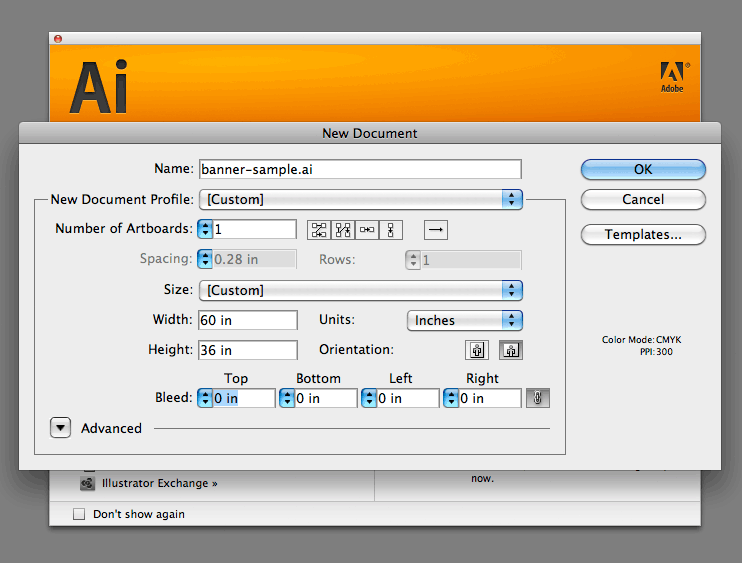
First, create a new Illustrator document at 60” wide by 36” tall and save this file as banner-sample.ai.
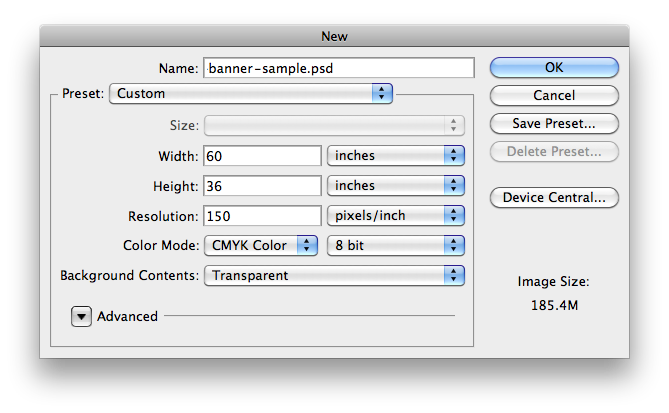
Next create a new Photoshop document with the same dimensions 60” wide by 36” tall and save this file as banner-sample.psd.
Create Your Photoshop Image File
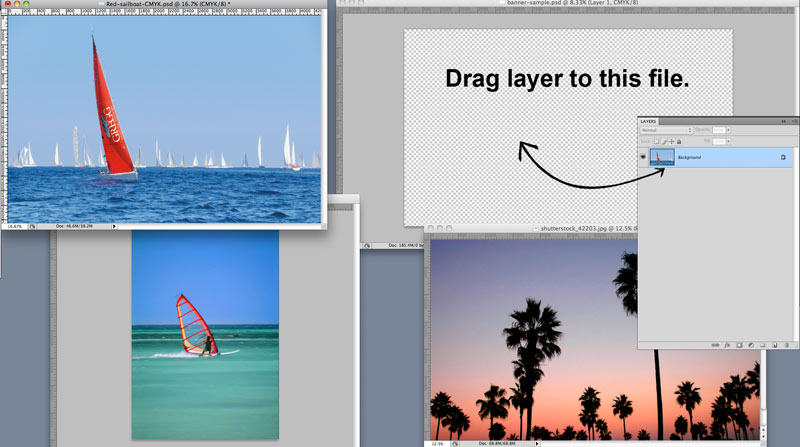
Open every image needed for your banner design. Float all in separate windows; Window>Arrange>Float All In Windows. Tile the windows so they are all visible; Window>Arrange>Tile. This makes it easier to drag one image into another.
Open the layers paletteA palate can be a set of colors used in a painting program or the number of colors a device can disp... More; Windows>Layers and drag the image from the layers palette into the banner-sample.psd. Repeat this for every image. This workflow is also a great way to determine if the image resolutionImage resolution measures the number of pixels in an image as it is displayed or printed. Pixels Per... More is correct for your project. If an image is really small when you drag it into the banner-sample.psd file, then it is too small for this banner and should be replaced with something else.
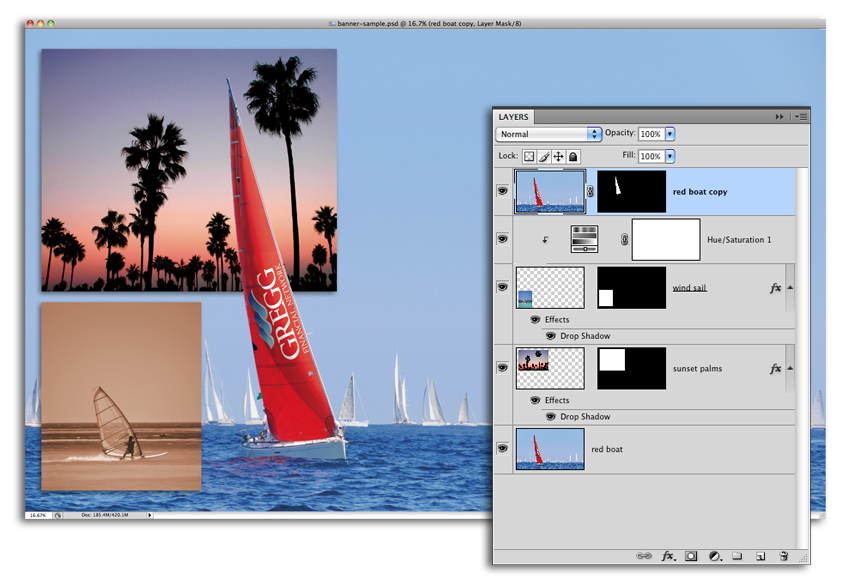
Assemble your images and save the banner-sample.psd file.
Create Your Illustrator Layout File
Open the banner-sample.ai file. View the layers palette; Windows>Layers.
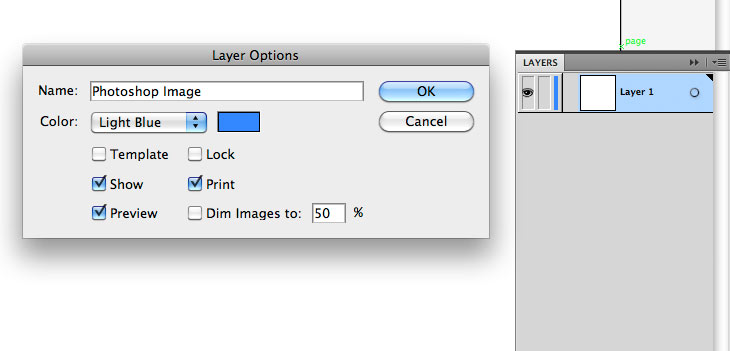
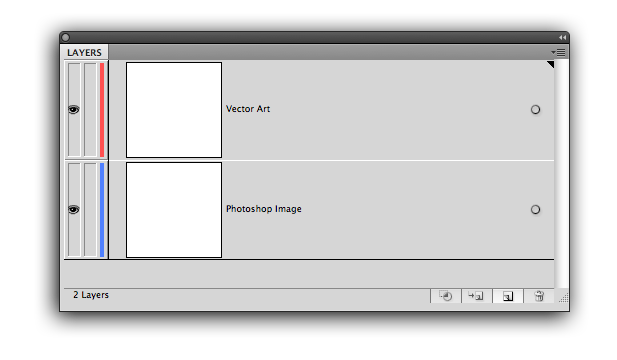
Double Click on LayerAll objects have a stacking order, like a stack of paper. When the layer (paper) is opaque it covers... More 1 and rename it to Photoshop Image. Add a new layer and name it Vector Art. Make sure the Vector Art layer is above the Photoshop Image layer.
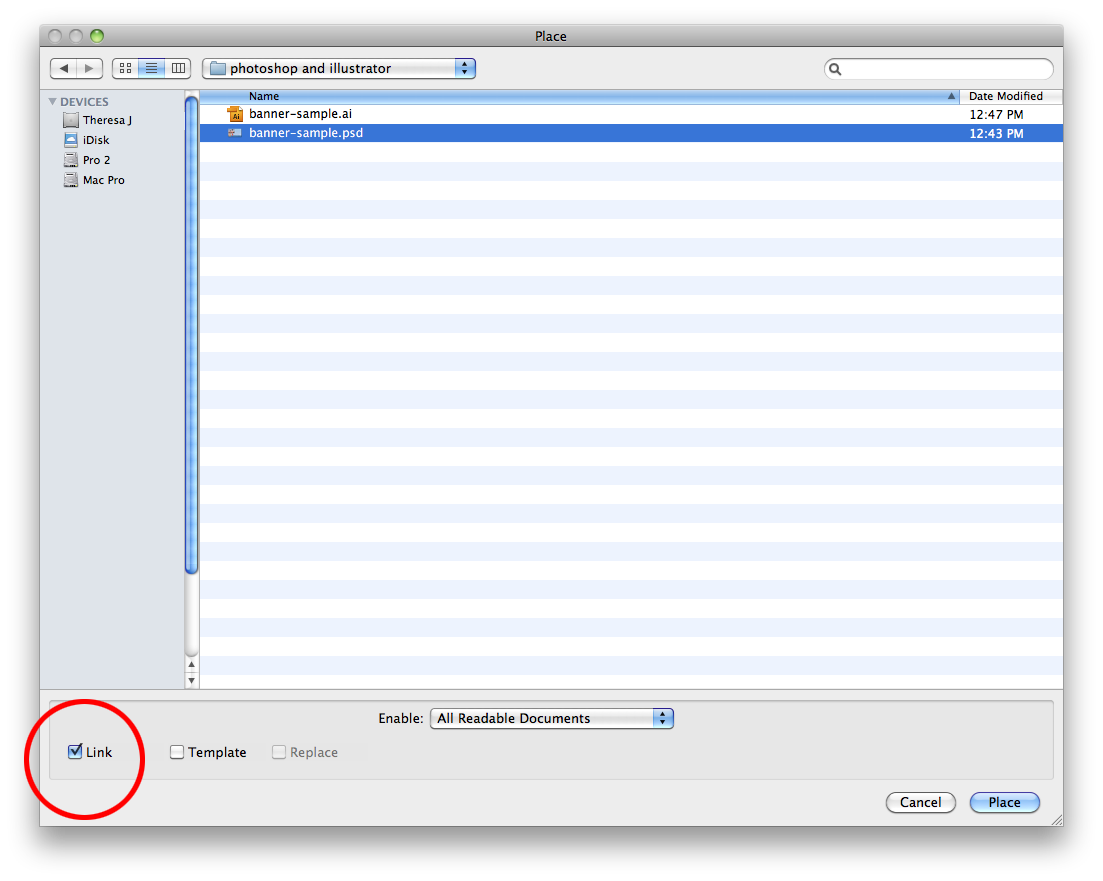
Place the banner-sample.psd file on the Photoshop Image layer. Make sure the linkLink describes a graphic asset file that is placed in a layout application without being embedded in... More box is checked in the place image dialog box.
Add your text, logos and any other vector art on the Vector Art layer.
Some of the text is not very legible over the Photoshop image so we are going to add some drop shadows and glow effects, but we want to do this in the Photoshop file not the Illustrator layout.
Add Photoshop Effects To The Vector Art
On the Vector Art layer in Illustrator, draw a rectangular shape with no fill and no stroke. Make it the exact size of the art board. Now your vector art is exactly the same size as your Illustrator and Photoshop canvases. This is the key to getting your illustrator vector art to register with your Photoshop image file.
Select everything on the Vector Art layer and Copy the selected content to your clipboard.
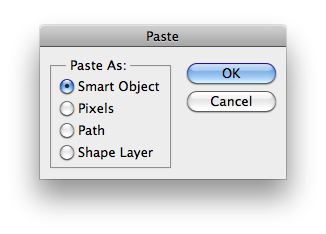
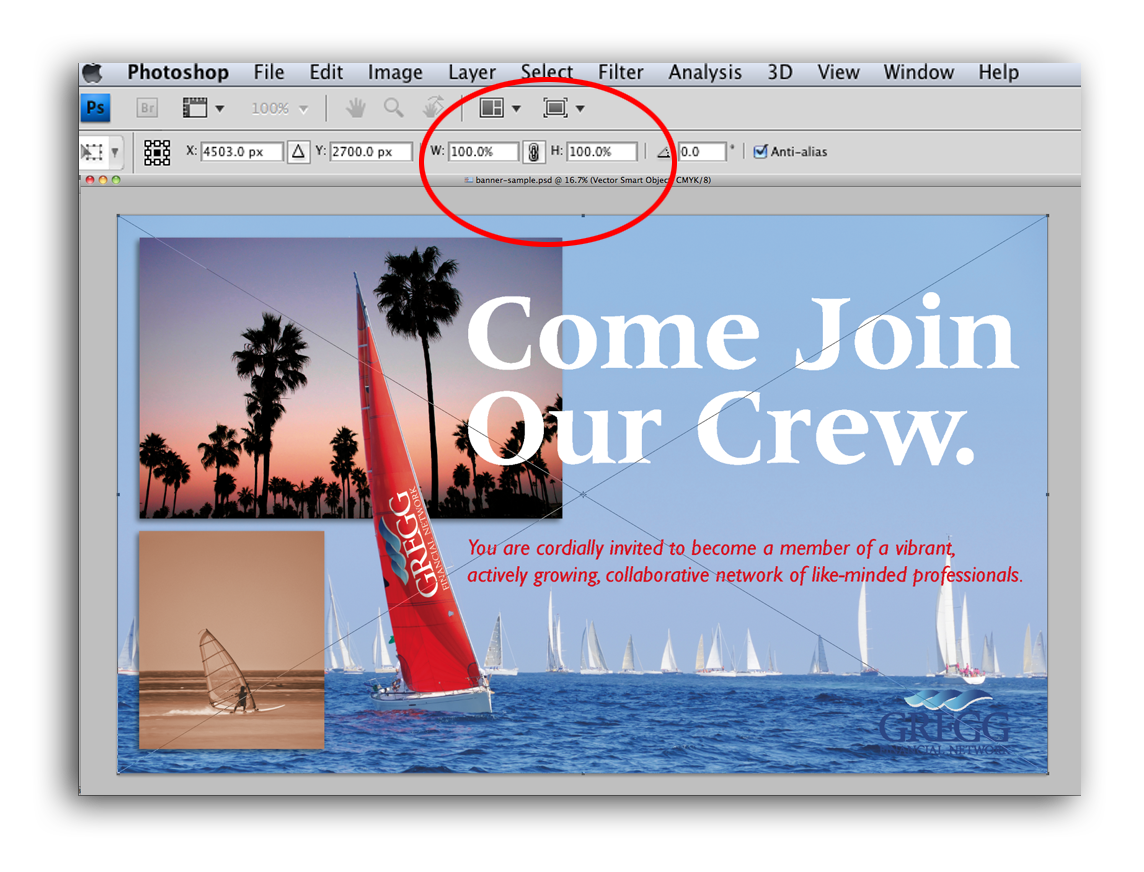
Switch to Photoshop and open the banner-sample.psd. Paste the content from your clipboard. Select the Smart Object paste option. The vector art should paste exactly into place at 100% scale. This is critical. Make sure it has pasted at 100% before committing the place.
Rename the new Smart Object layer to FPO (for position only) and make sure it is the top most layer.
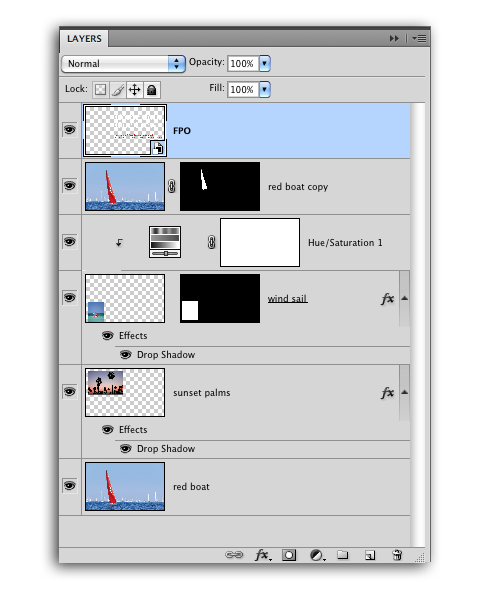
Apply a drop shadow layer effect to the new FPO layer; go to Layer>Layer Style>Drop Shadow. Play with the settingsAn application's behaviors and preferences are controlled with settings. More until they look right for your design. Make sure the drop shadow effect looks perfect before going to the next step.
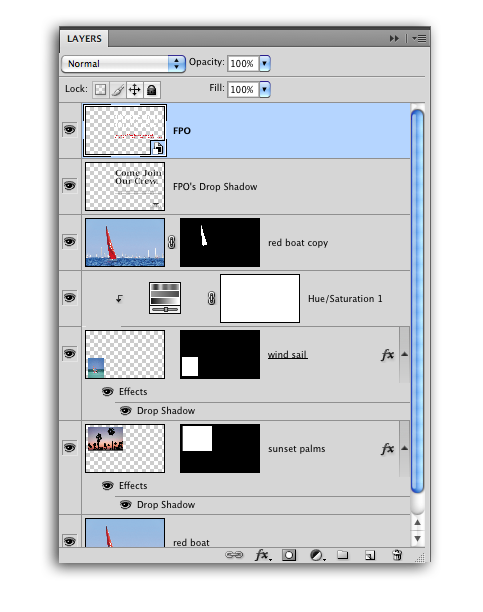
In the layers panel right click on the layer effects or go to; Layer>Layer Style>Create Layer. This is the key to separating the vector art from the bitmap shadow effect. If you get this message, “Some aspects of the Effects cannot be reproduced with layers!”, just click Okay. This creates a new layer called “FPO’s Drop Shadow”. Erase or delete the shadows not needed for the design. I deleted everything except the shadow around the white text “Come Join Our Crew”.
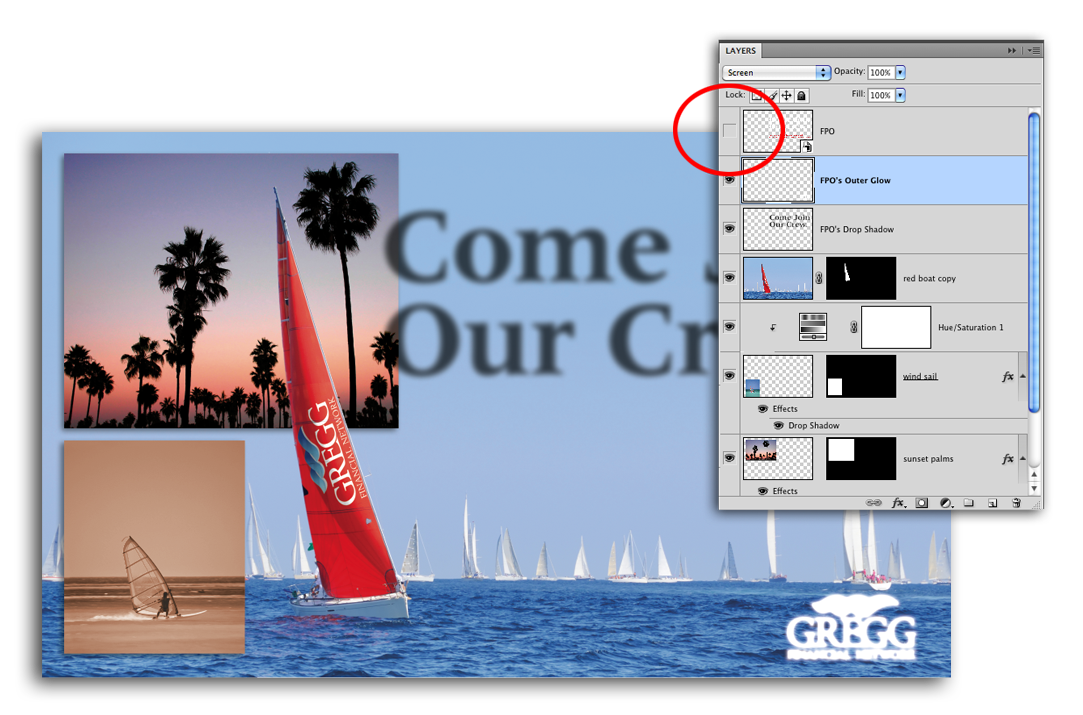
Select the FPO layer again and apply an Outer Glow effect. I changed the color to white, set it to 100% and applied a 16% spread at a 50 pixelPixels are the smallest unit of a digital display or digital image. A raster or bitmap image is made... More size. Create a layer of this effect by repeating the steps above. This will create a new layer called “FPO’s Outer Glow”. Erase or delete the glows not needed in the design. I removed everything except the glow around the logo in the lower right corner.
Turn off the visibility of the FPO layer by clicking on the eyeball icon. Save your file.
Finalize the Illustrator Layout
Switch back to Illustrator. If your illustrator banner-sample.ai file is still open, you will get a message that says, “Some files are missing or modified in the Links panel. Would you like to update them now?” Click Yes.
Wah lah! The sample banner layout is now complete with vector art still vector and bitmap effects created in Photoshop. Everything should register perfectly.
Notes About File Size
My working layered .psd is 392.8 mg. The Illustrator layout is 80.7 mg. If I save the .psd file as a .tif file with LZW compressionCompression removes information and reduces file size. Some types of compression can cause losses an... More the file size is reduced to 58.2 mg. I can then replace the linked .psd file in Illustrator with the .tif file. Saving the Illustrator layout with the PDFPDF is short for Portable Document Format. More compatibility turned off, will reduce the Illustrator file size to 1.1 meg.
For more detailed information regarding file sizes, see Working With Really Large Files.

