I have the privilege of working for a publisher of childrens books for the iPad and iPhone. My job as the graphic artist is to convert the book’s images from their original print format to files for interactive display.
Sometimes the original print files are not available. In this situation the pages of the printed book are scanned and sent to me for color correction and reformatting.
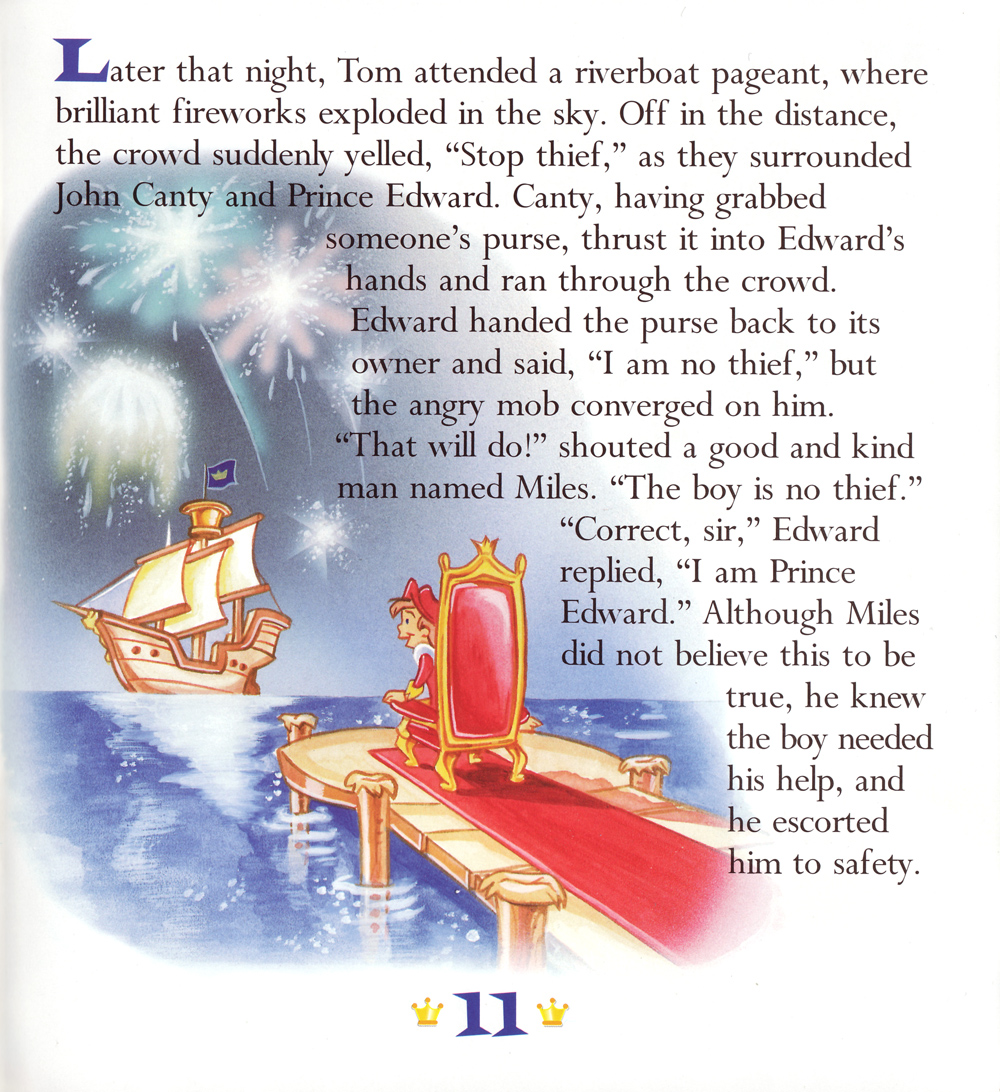
Printed text has to be removed from each scanned page. When the text goes over the illustration like this example, the editing can be challenging and time consuming.
The Prince and the Pauper (pg. 11). CopyrightCopyright protects original works of authorship. More Golden Films.
Content-Aware Fill
Photoshop CS5 Content-Aware Fill is an obvious choice for this kind of edit, but it doesn’t always return the results hoped for.
This is my first attempt.

For this example you can see that I created a loosely drawn lassoFreeform, hand-drawn shape selections are made with the Lasso tool. More selectionA selection protects non selected areas so that they can't be edited. More of the text area covering the illustration. Content-aware seemed to get really confused about what to fill the selection with.
Select by Color Range
The key to the Content-Aware filterA filter is a digital effect used to modify image pixels and selections. Algorithms control modifica... More is in the selection. Content-Aware works best when the selected area is specific to the objects you want to remove.
Follow these steps for almost fool proof results.
- Use the eye dropper tool to pick up the color of the text.
- Go to Select>Color Range
- Use the + eye dropper to add to the selection and the – eye dropper to remove from the selection. Preview with white matte to get a good idea of how well the text is being selected. Adjust the Fuzziness to expand or reduce the selection. Hit OK when you are happy with the preview.

- Check the selection by viewing the selection in the quick mask mode, (q) gives you a quick mask alpha channelAn alpha channel contains a mask or partial picture element or color. Photoshop saves selection to t... More, (~) hides the RGBWhat is RGB? RGB stands for Red, Green, and Blue. These are the colors of light. Monitors, TVs, and ... More channels giving you a blackBlack is the fourth color in the process of four-color printing. The "K" in CMYK. Black adds tonal d... More and white preview of the selection.

- Clean up the selection by painting out the areas of the illustration that shouldn’t be part of the text selection.
- Return to the selection by hitting the (q) key again.
- Finally, expand the selection by going to Select>Modify>Expand… Expand by 1 pixelPixels are the smallest unit of a digital display or digital image. A raster or bitmap image is made... More.
Now for the Magic!
Click shift – delete to bring up the fill dialog box. Choose Content-Aware at 100%. Mode Normal.
The result is almost like magic. All you need to do now is air brushWhat is (Digital) Brush? A brush, found in digital painting applications such as Photoshop, Painter,... More out a few specs left over from the text. The illustration looks perfect.

Remember the better the selection, the better the results. This applies to all uses of the Content-Aware filter.