
I was so certain I had something special with this shot, that I took 4 sets of brackets on my Canon. That’s a total of twelve slightly different exposed images. I wanted to make sure I captured every fragment of light in the scene so I kept shooting longer and longer exposures.

I ended up using these four images for my HDRHDR is short for High Dynamic Range. HDR (High Dynamic Range) Photography refers to capturing an ent... More.
The dynamic rangeDynamic range is the difference between the brightest and the darkest values. More is so wide that even with HDR processing I struggled to hold the details from highlights to shadows. I decided that the shadow details were most important. In Photomatix I adjusted the settingsAn application's behaviors and preferences are controlled with settings. More focusing on the detail in the bushes and the reflections in the water.

Above is the result of the tonemapping in Photomatix. Overall the image is decent but I was really disappointed in the lost highlight detail, especially in the Winged Victory of Samothrace sculpture. The sculpture is the keystone to the composition. The details are important to me so I took to Photoshop to fix it.
The following workflow is one I follow for every HDR image. This example just happens to be more extreme than most.
First, I open the tonemap image in Adobe Camera Raw (ACR). I bump up the blacks, add some clarity, increase the sharpness and remove some noise. (I make similar adjustments to every HDR image).
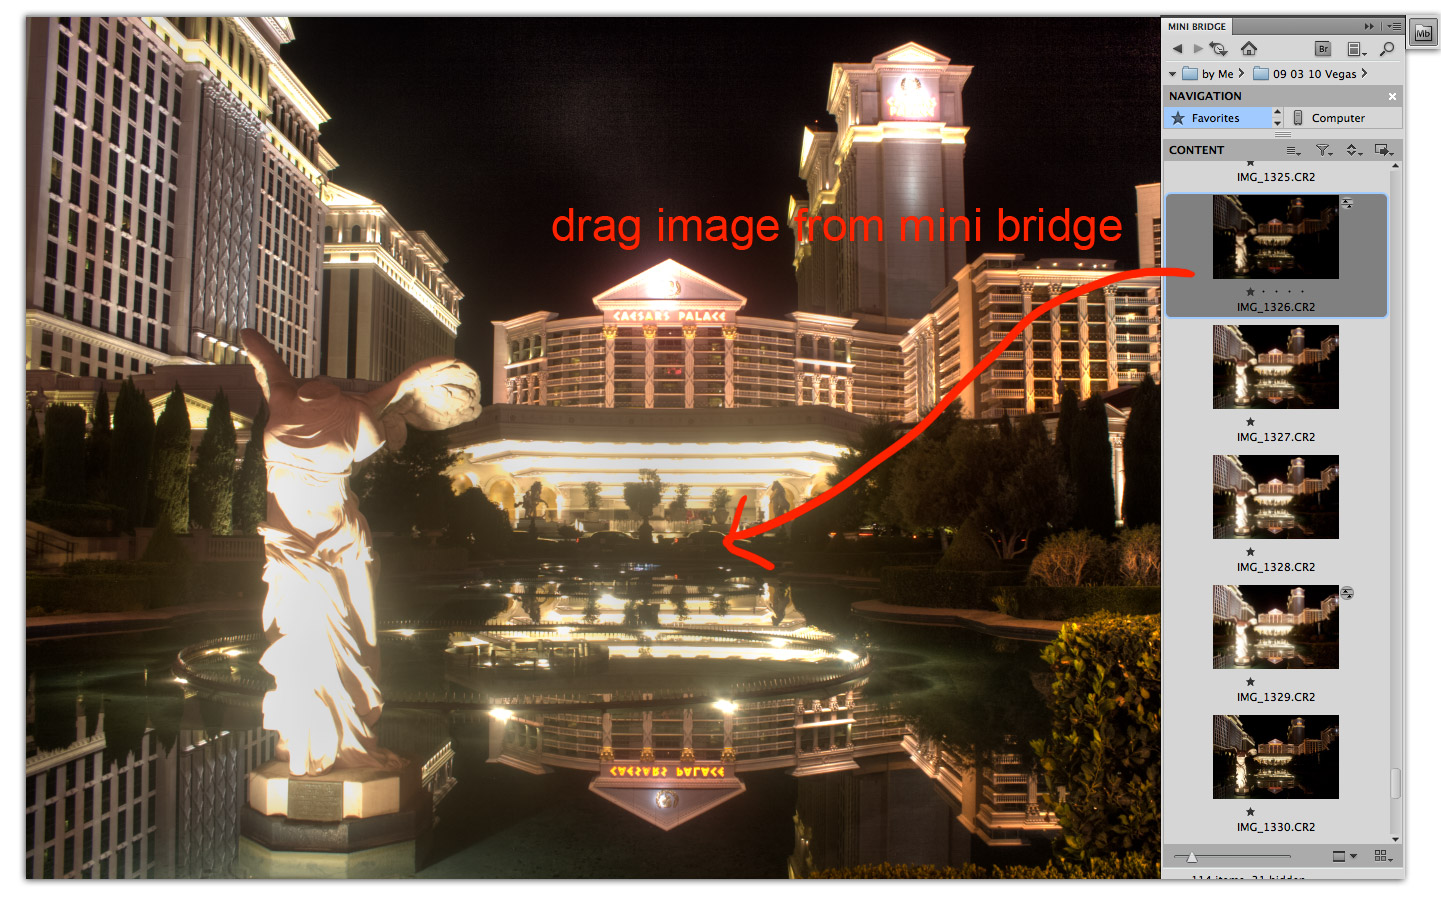
Next I open the edited tonemap image in Photoshop. With mini bridge (new to PS CS5) I find the original bracket with the best highlight detail. Dragging the image into my Photoshop file opens ACR and places the image as a smart object.

I mask the smart object layerAll objects have a stacking order, like a stack of paper. When the layer (paper) is opaque it covers... More with a blackBlack is the fourth color in the process of four-color printing. The "K" in CMYK. Black adds tonal d... More mask to hide everything, then I paint the mask with white to reveal the highlight areas. The mask reveals that the densities between the layers don’t match. This is where smart objects are so smart. Double clicking on the smart object layer brings up ACR where I can make some quick adjustments to the overall density by adding fill light. Closing ACR by clicking “DONE” returns to Photoshop. If the density or colors still aren’t perfect I try it again until it is just right.

For a more seamless match I brushWhat is (Digital) Brush? A brush, found in digital painting applications such as Photoshop, Painter,... More in some shadow density to the tonemap layer using a masked levels adjustment layer. See the middle layer above where I have brushed in shadow weight just behind the sculpture and to the left of it. This blends the values of the background scene with the sculpture detail. My shadow densities are so well matched at this point that I can use a large soft brush to paint in all of the lost highlight details.
I finish the image by making a flattened copy of my layers and straightening the vertical lines with the transform tool.
HDR is an amazing photographic tool but it is just one tool. Have a vision for your HDR images when capturing your brackets. Get as close as possible to your vision with the HDR software of your choice and then use Photoshop to make it perfect.